App Introduction
You can use the ProjectTimeTracker as an ordinary time clock or to keep track of times in individual projects.
And this is how it works:
1. Create a Project
Let’s say you’re a teacher who wants to track the time spent on lesson preparation. To do that, create a new project named Lesson Preparation. Simply tap the plus symbol in the top right corner.
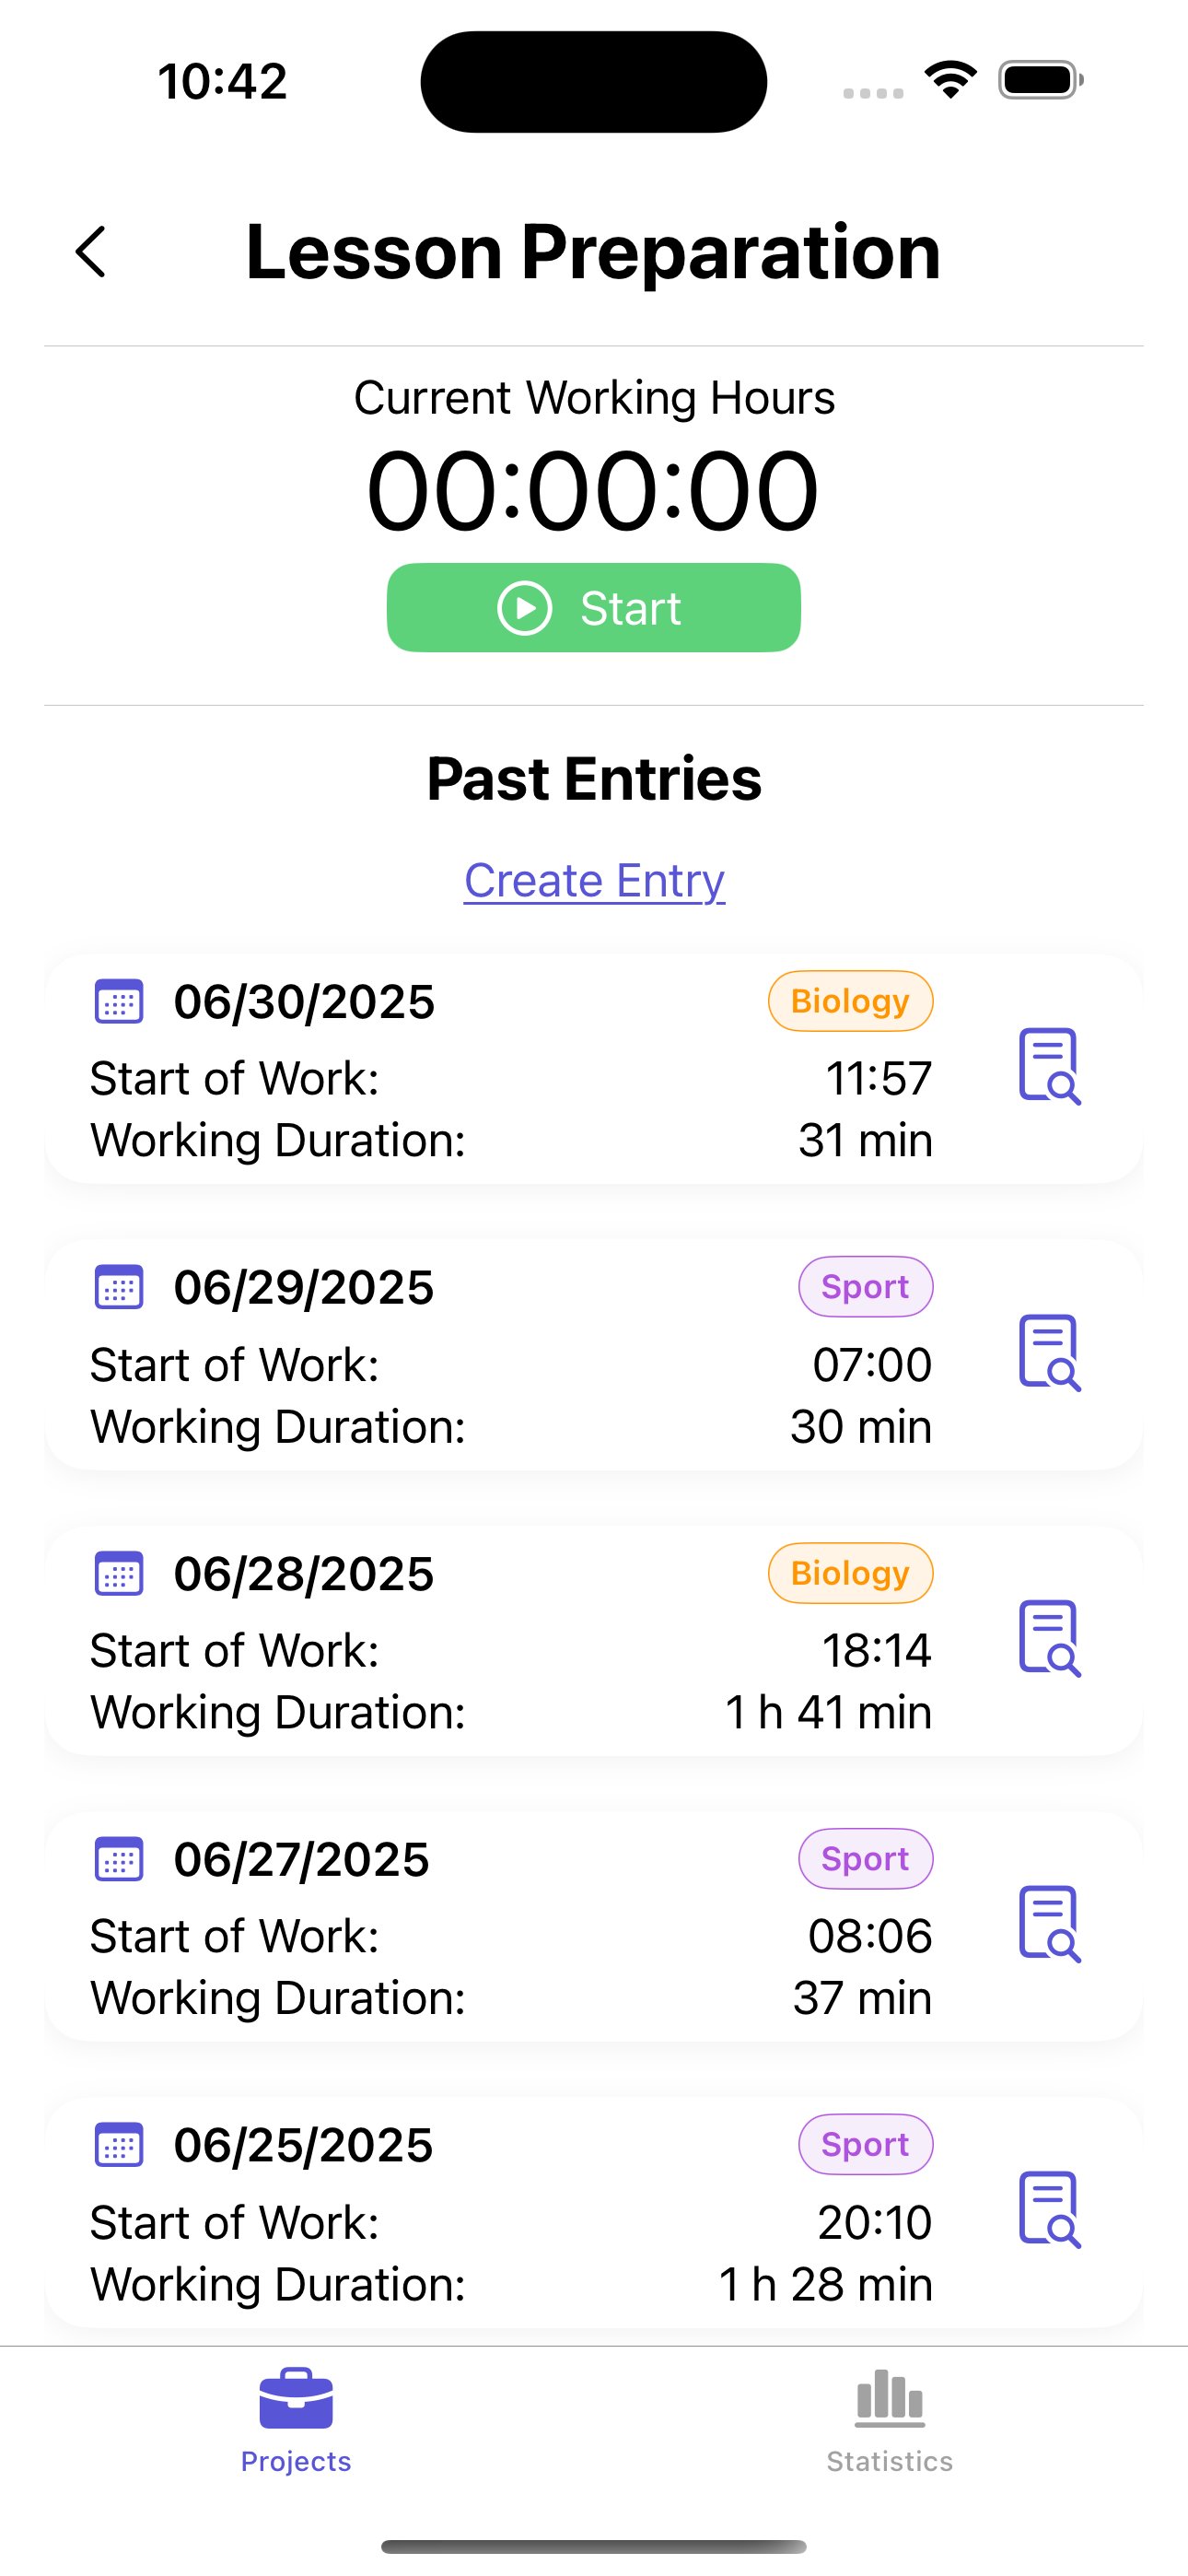
2. Record Working Time
Start your first time recording now. You can pause and resume it at any time. When you finish your work, tap the Stop button, then the Save button.
3. Modify Entry and Add Tags
After saving, you can edit the entry to adjust the start time or duration. You can also add a note describing what you did. Past entries can be edited as well - just tap the one you want to update.
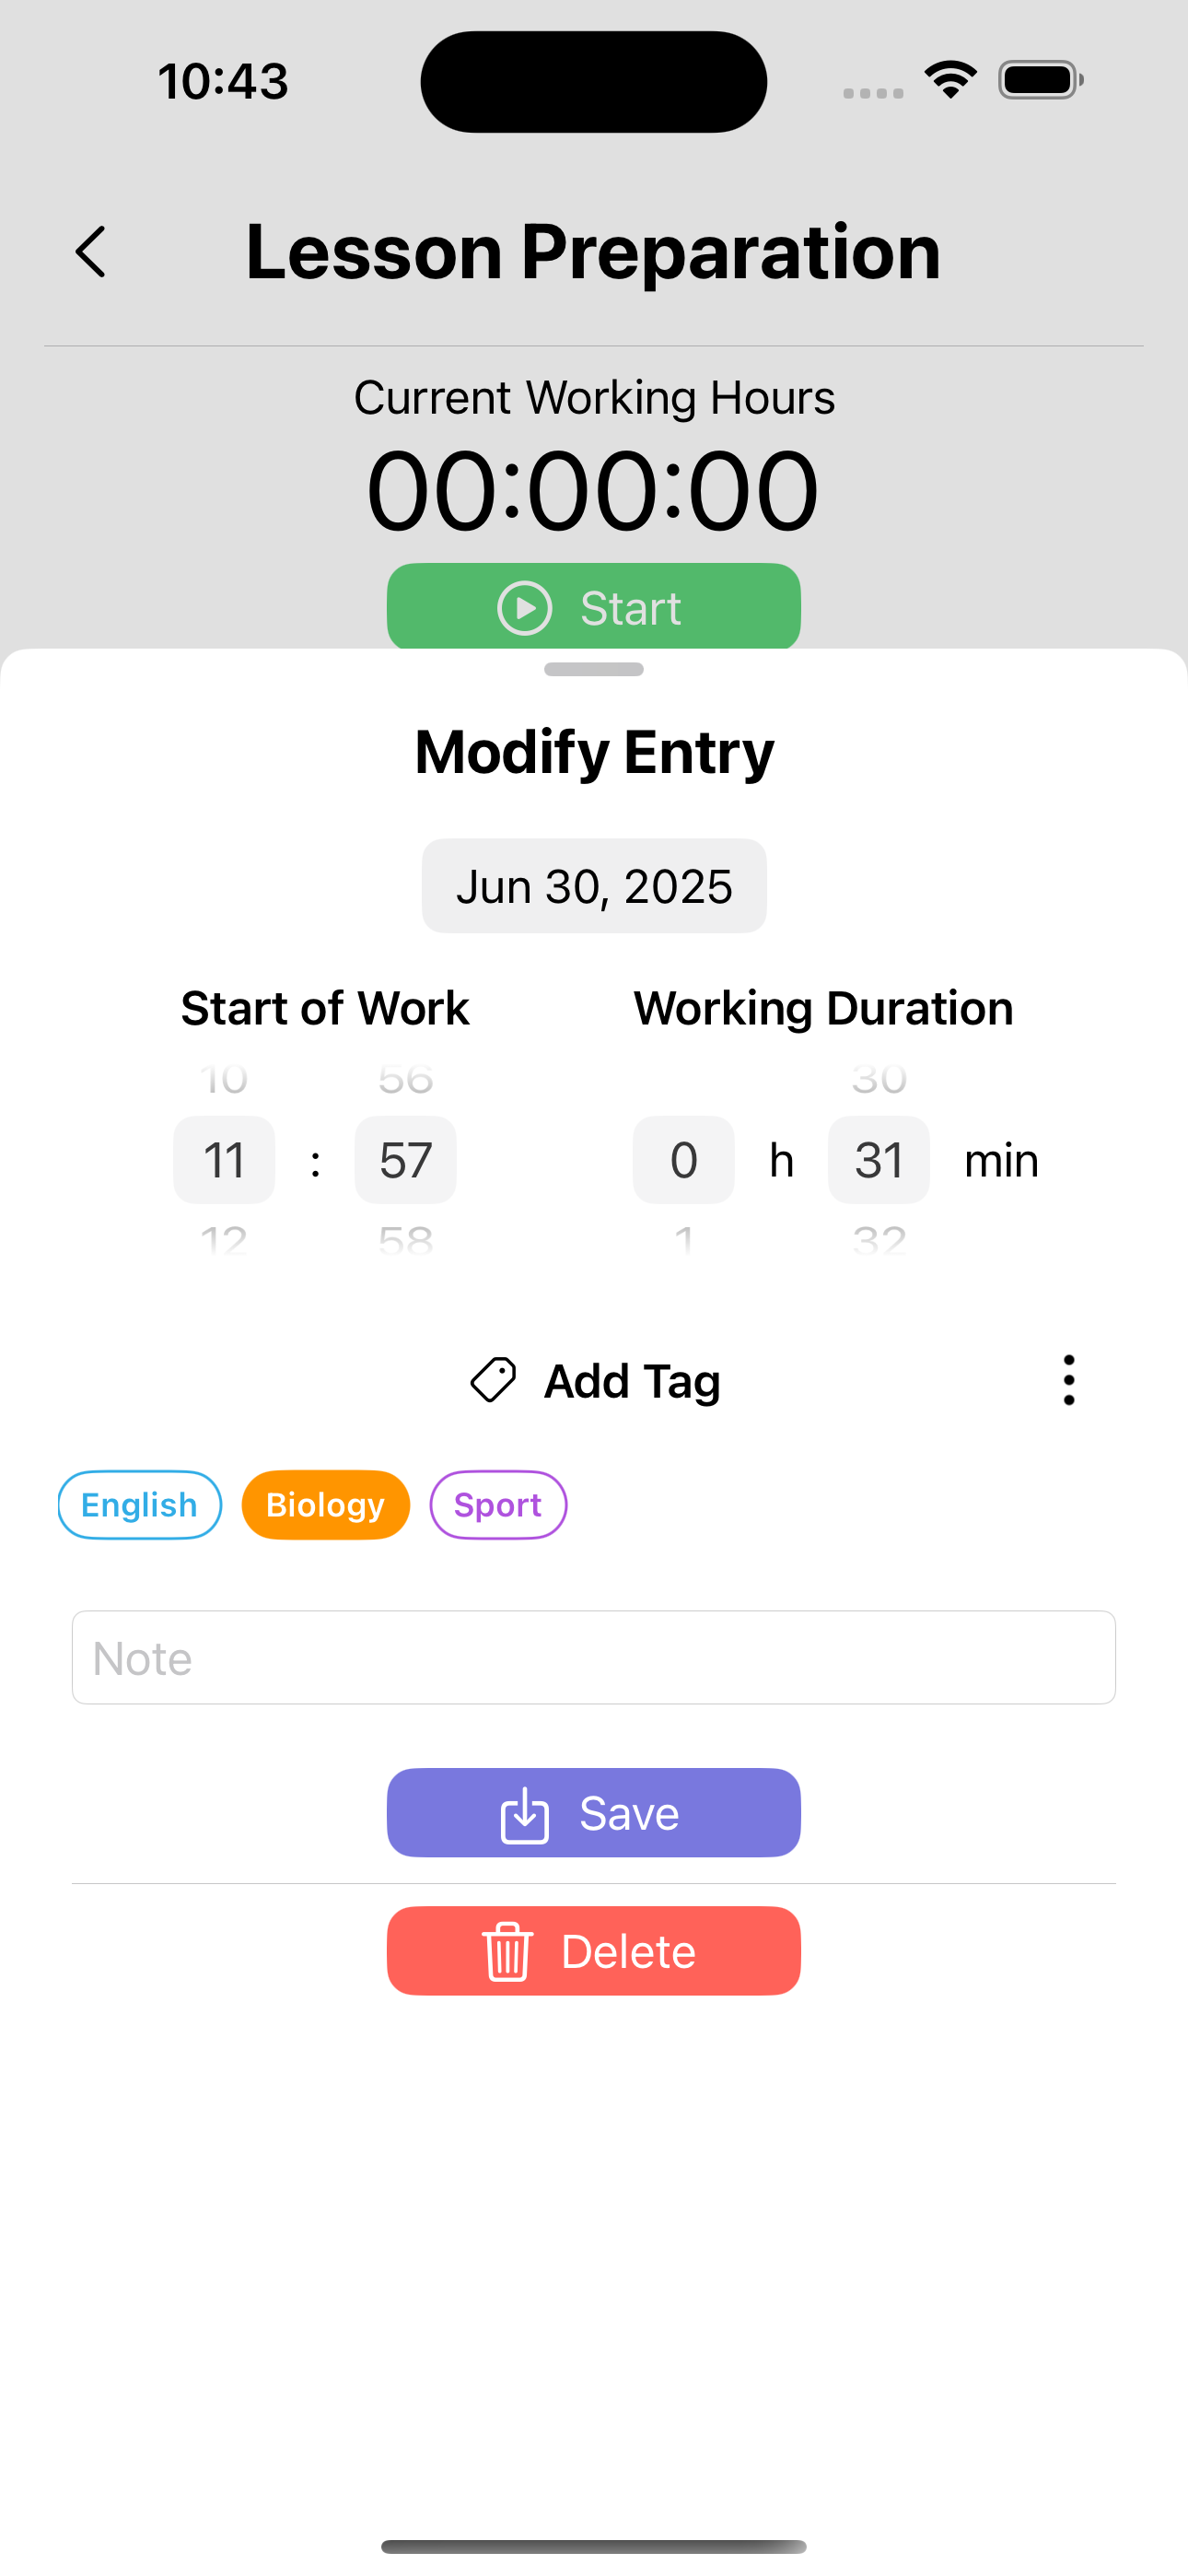
Add tags to organize your time entries even further. In the lesson preparation example, you might tag time entries with subjects like Biology or English classes. This lets you later see how your time is distributed across subjects.
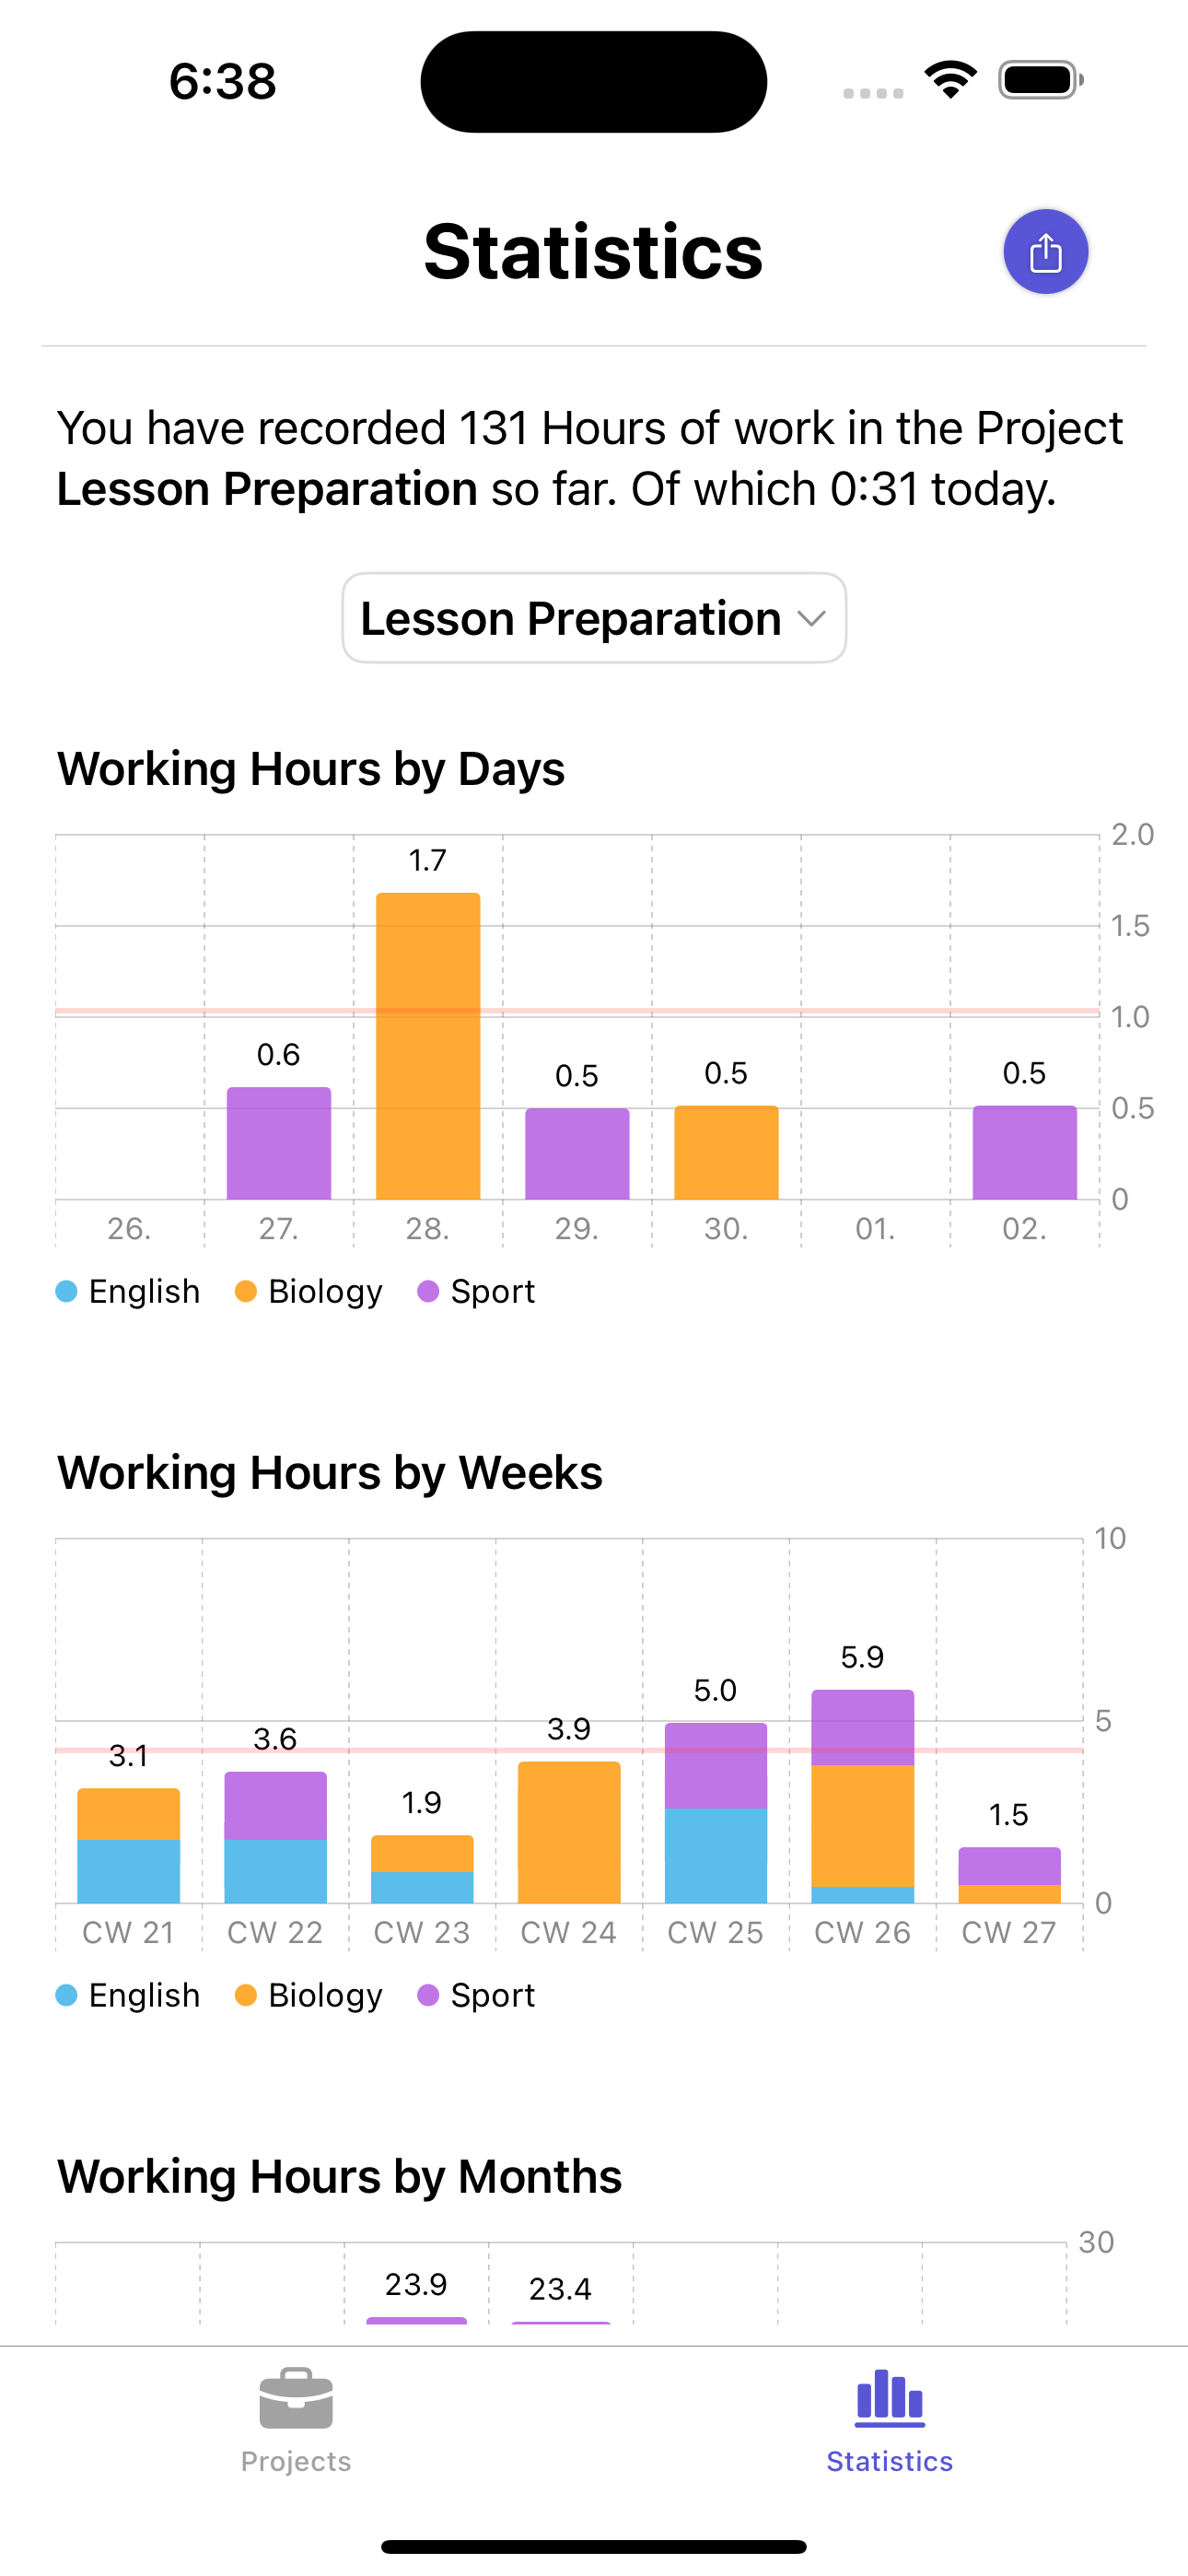
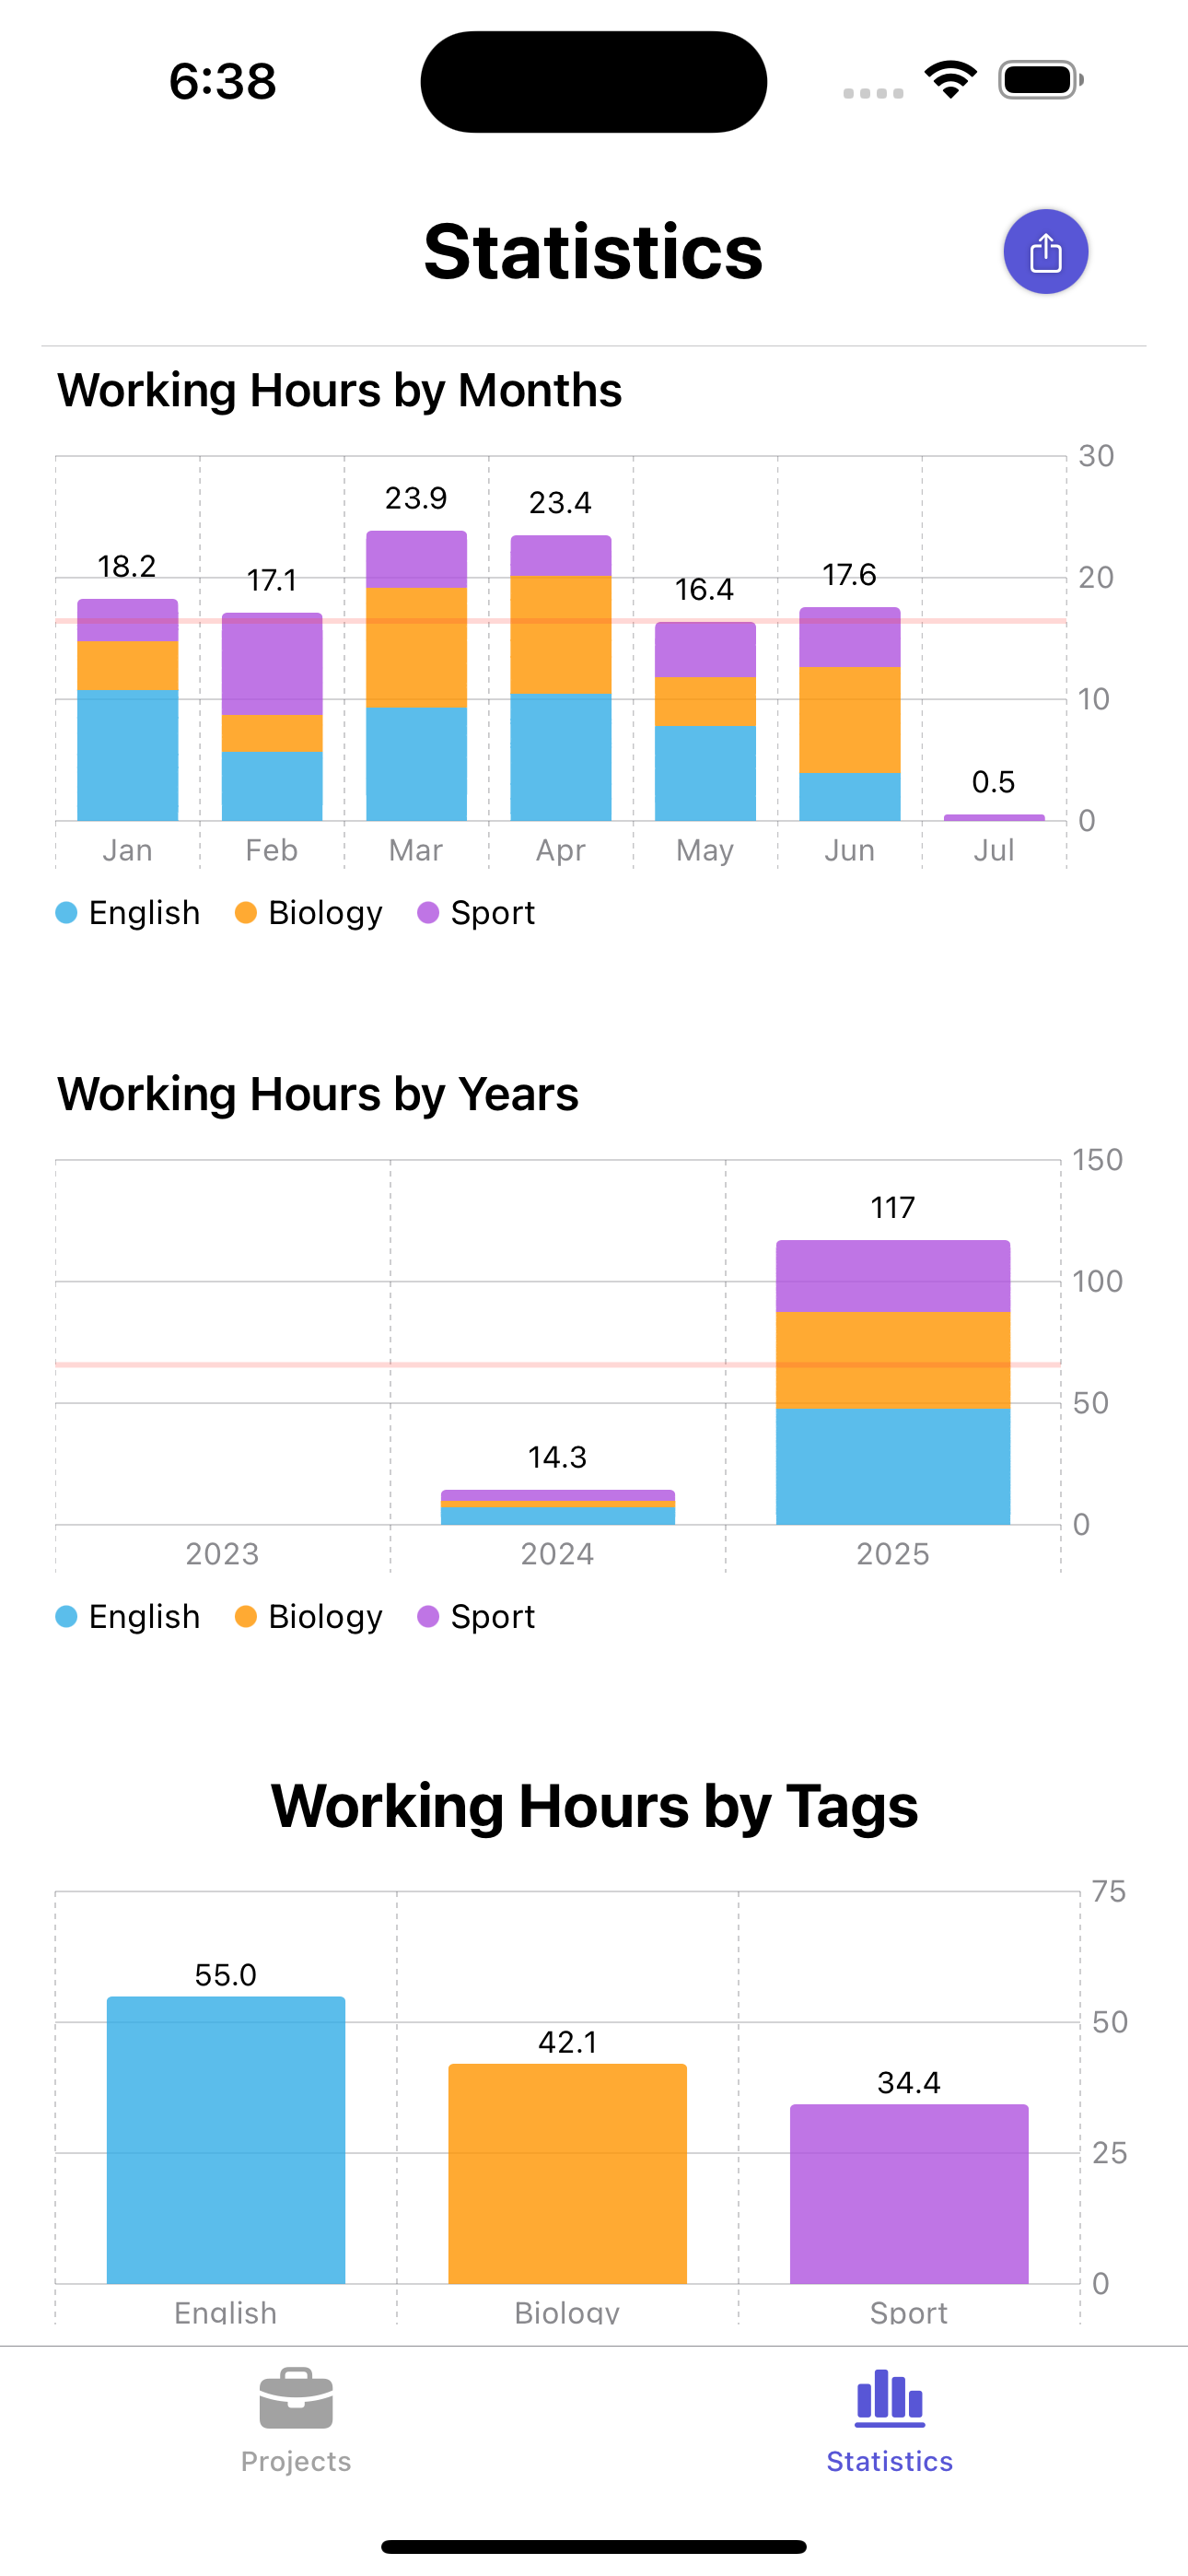
4. View Statistics
Tap on the Statistics tab in the bottom menu to see a graphical analysis of your times. The colours in the diagrams represent the tags. In the legend, you can see which tag is displayed in which colour. To display older values, swipe to the right in the charts.
Good to Know
Change Project Display Order
You can change the display order of your projects by tapping and holding on a project and then dragging it up or down in the list of projects. This will also change the order of the projects on the statistics page.
Edit Time Entries
You can edit older time entries at any time. To do this, click on the time entry and an edit view will open in which you can change the start time and duration of work. You can also add a note to the time entry here.
Download now on the App Store