How ProjectTimeTracker Works
Use ProjectTimeTracker as an ordinary time clock, or to track hours per project and client — the way most freelancers need to before they can invoice.
And this is how it works:
1. Create a Project
Let's say you are redesigning a restaurant's website and need to know how many hours went into it before you invoice. Create a project for that client — here, Redesign: Bistro Portofino. Just tap the plus symbol in the top right corner or the Create first Project button.
2. Record Working Time
Start the timer when you begin billable work. You can pause and resume it at any time — useful when a call interrupts you mid-task. When you finish, tap the Stop button, then the Save button. The timer survives a force-quit or a reboot, so an afternoon of work is never lost because you forgot to stop it.
3. Modify Entry and Add Tags
After saving, you can edit the entry to adjust the start time or duration — handy when you started the timer ten minutes late. Add a note describing what you did, and it becomes the line item your client sees on the timesheet. Each entry can also be marked as Invoiced, so you always know what you have already billed. Past entries can be edited as well: just tap the one you want to update.
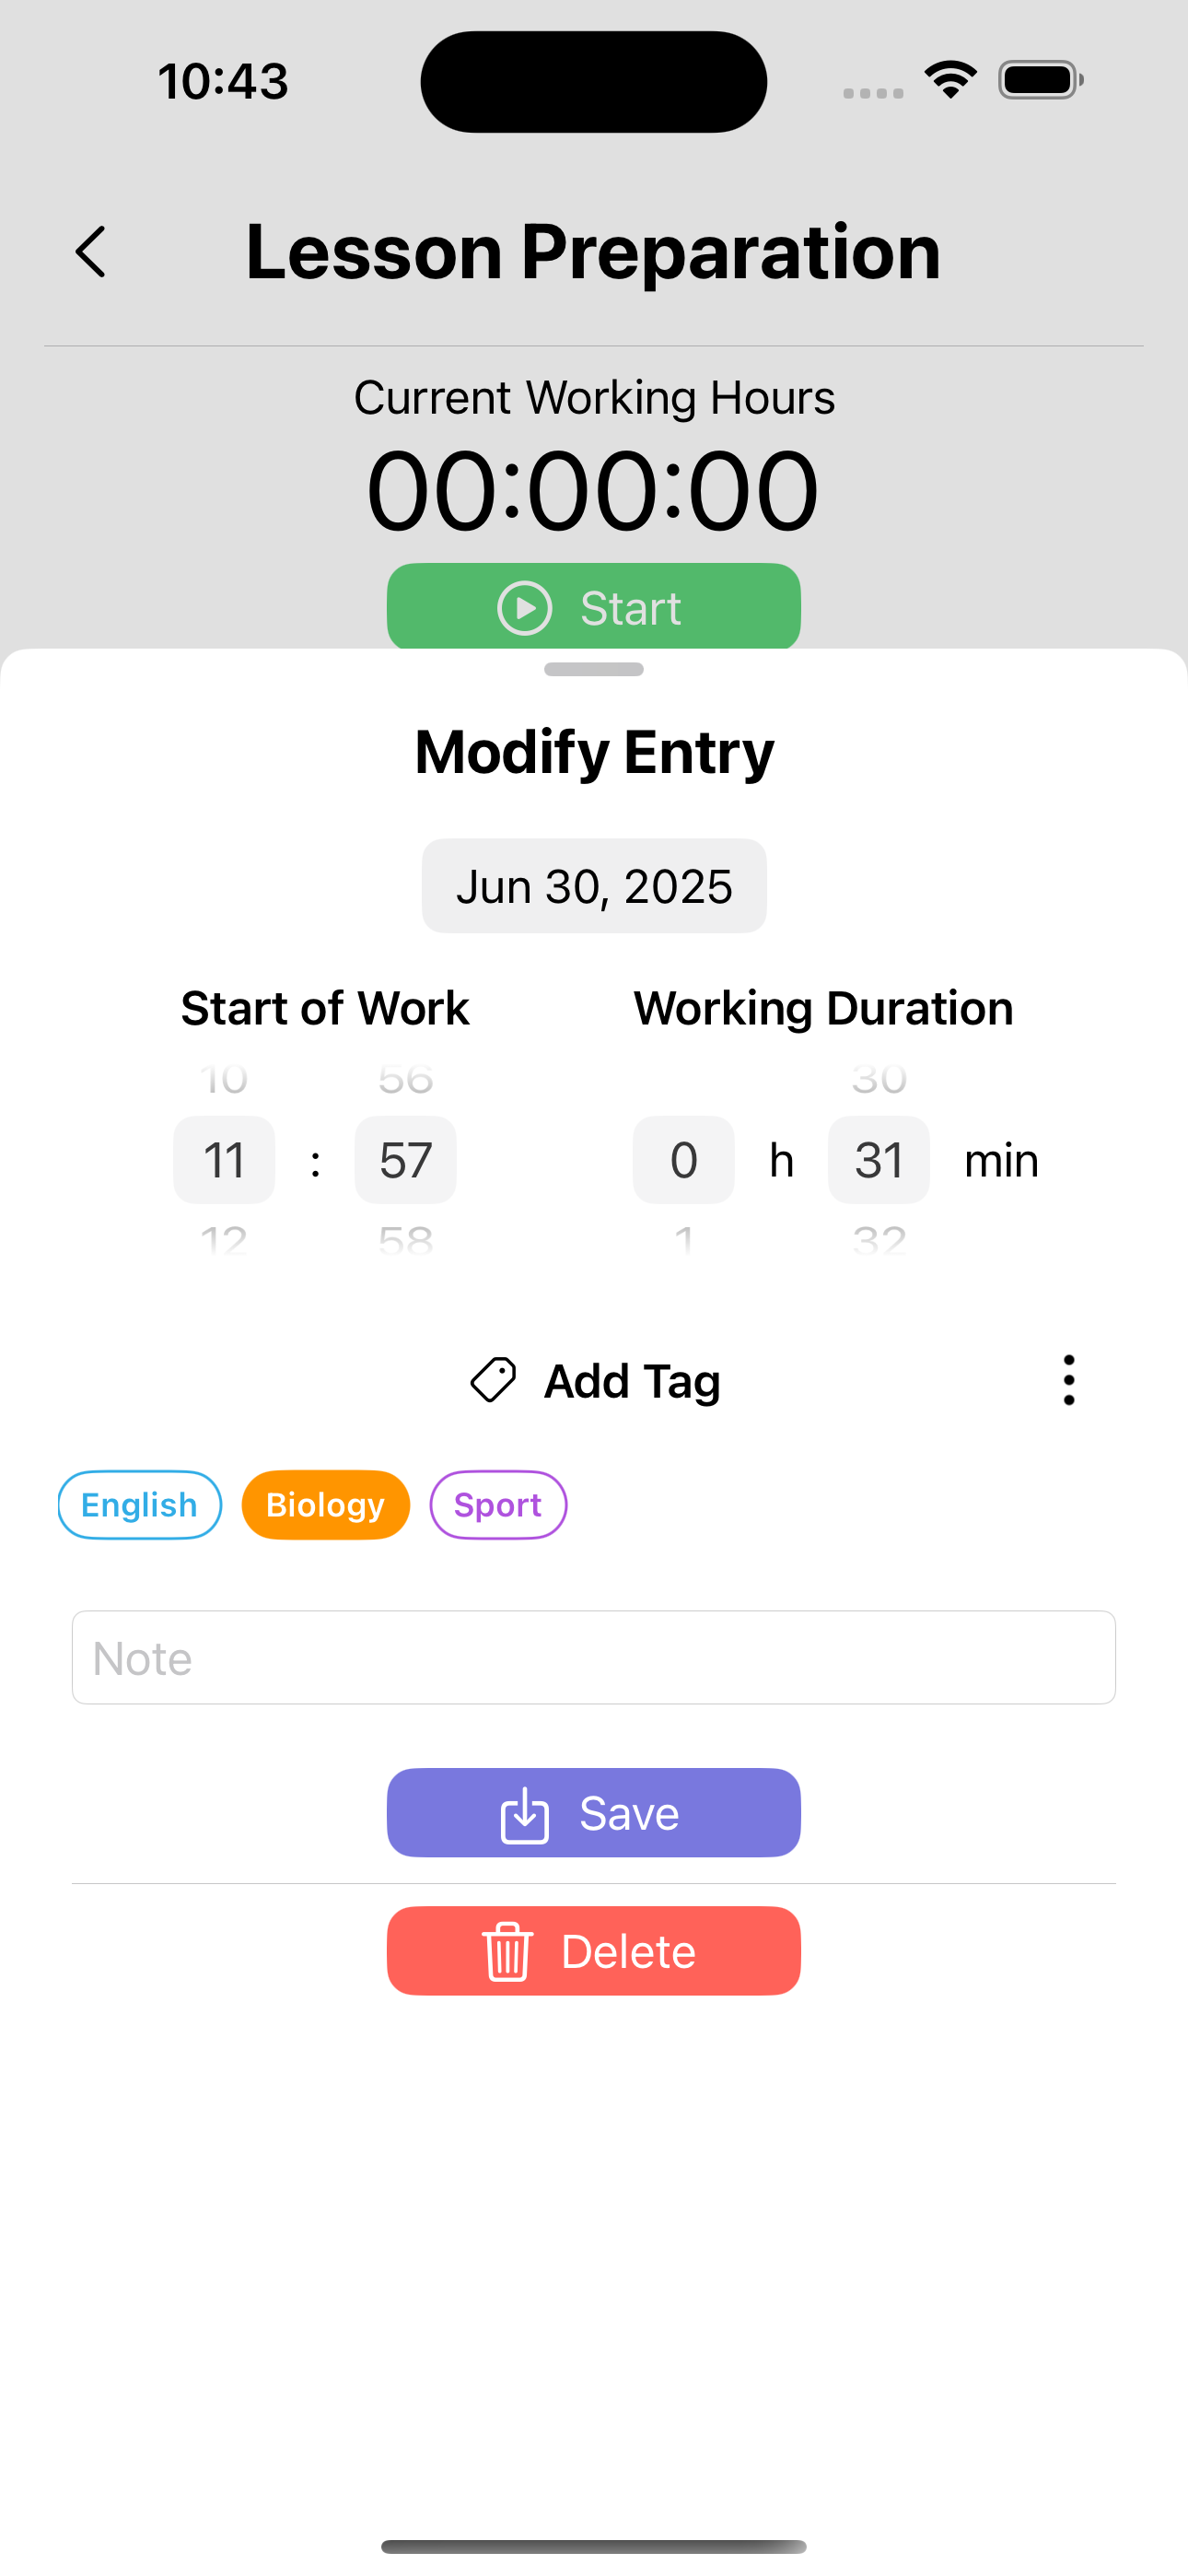
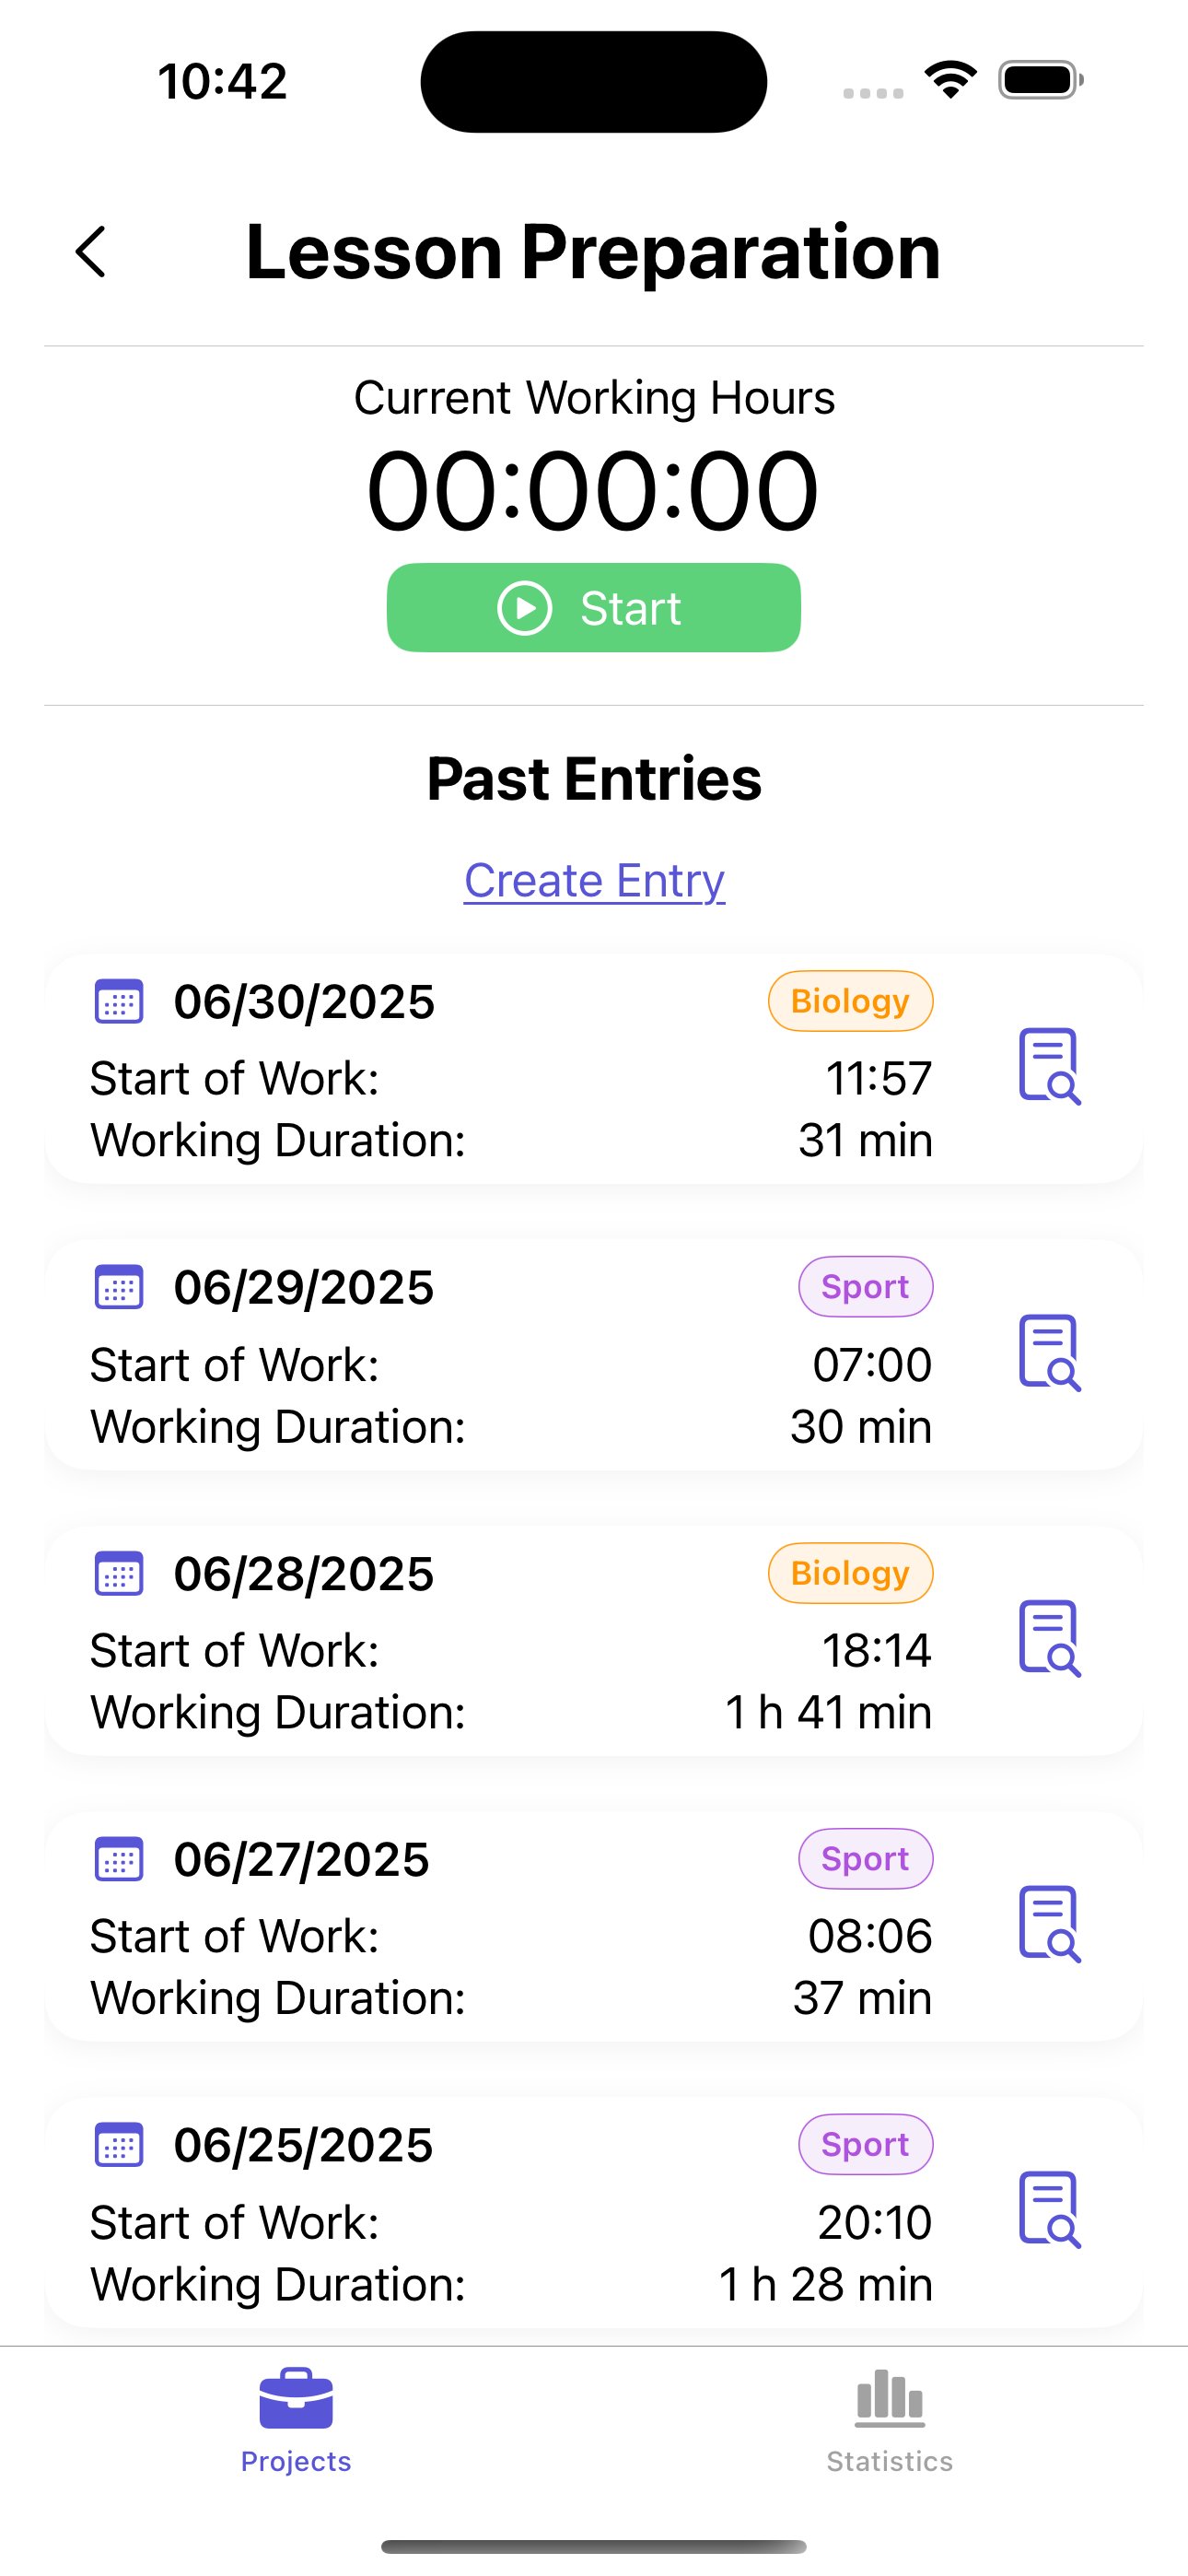
Add tags to break a project down further. Tag each entry with the kind of work it was — UI Design, Development, Meeting, SEO — and you can see exactly where the hours went when it is time to invoice, or when a client asks what they are paying for.
4. View Statistics
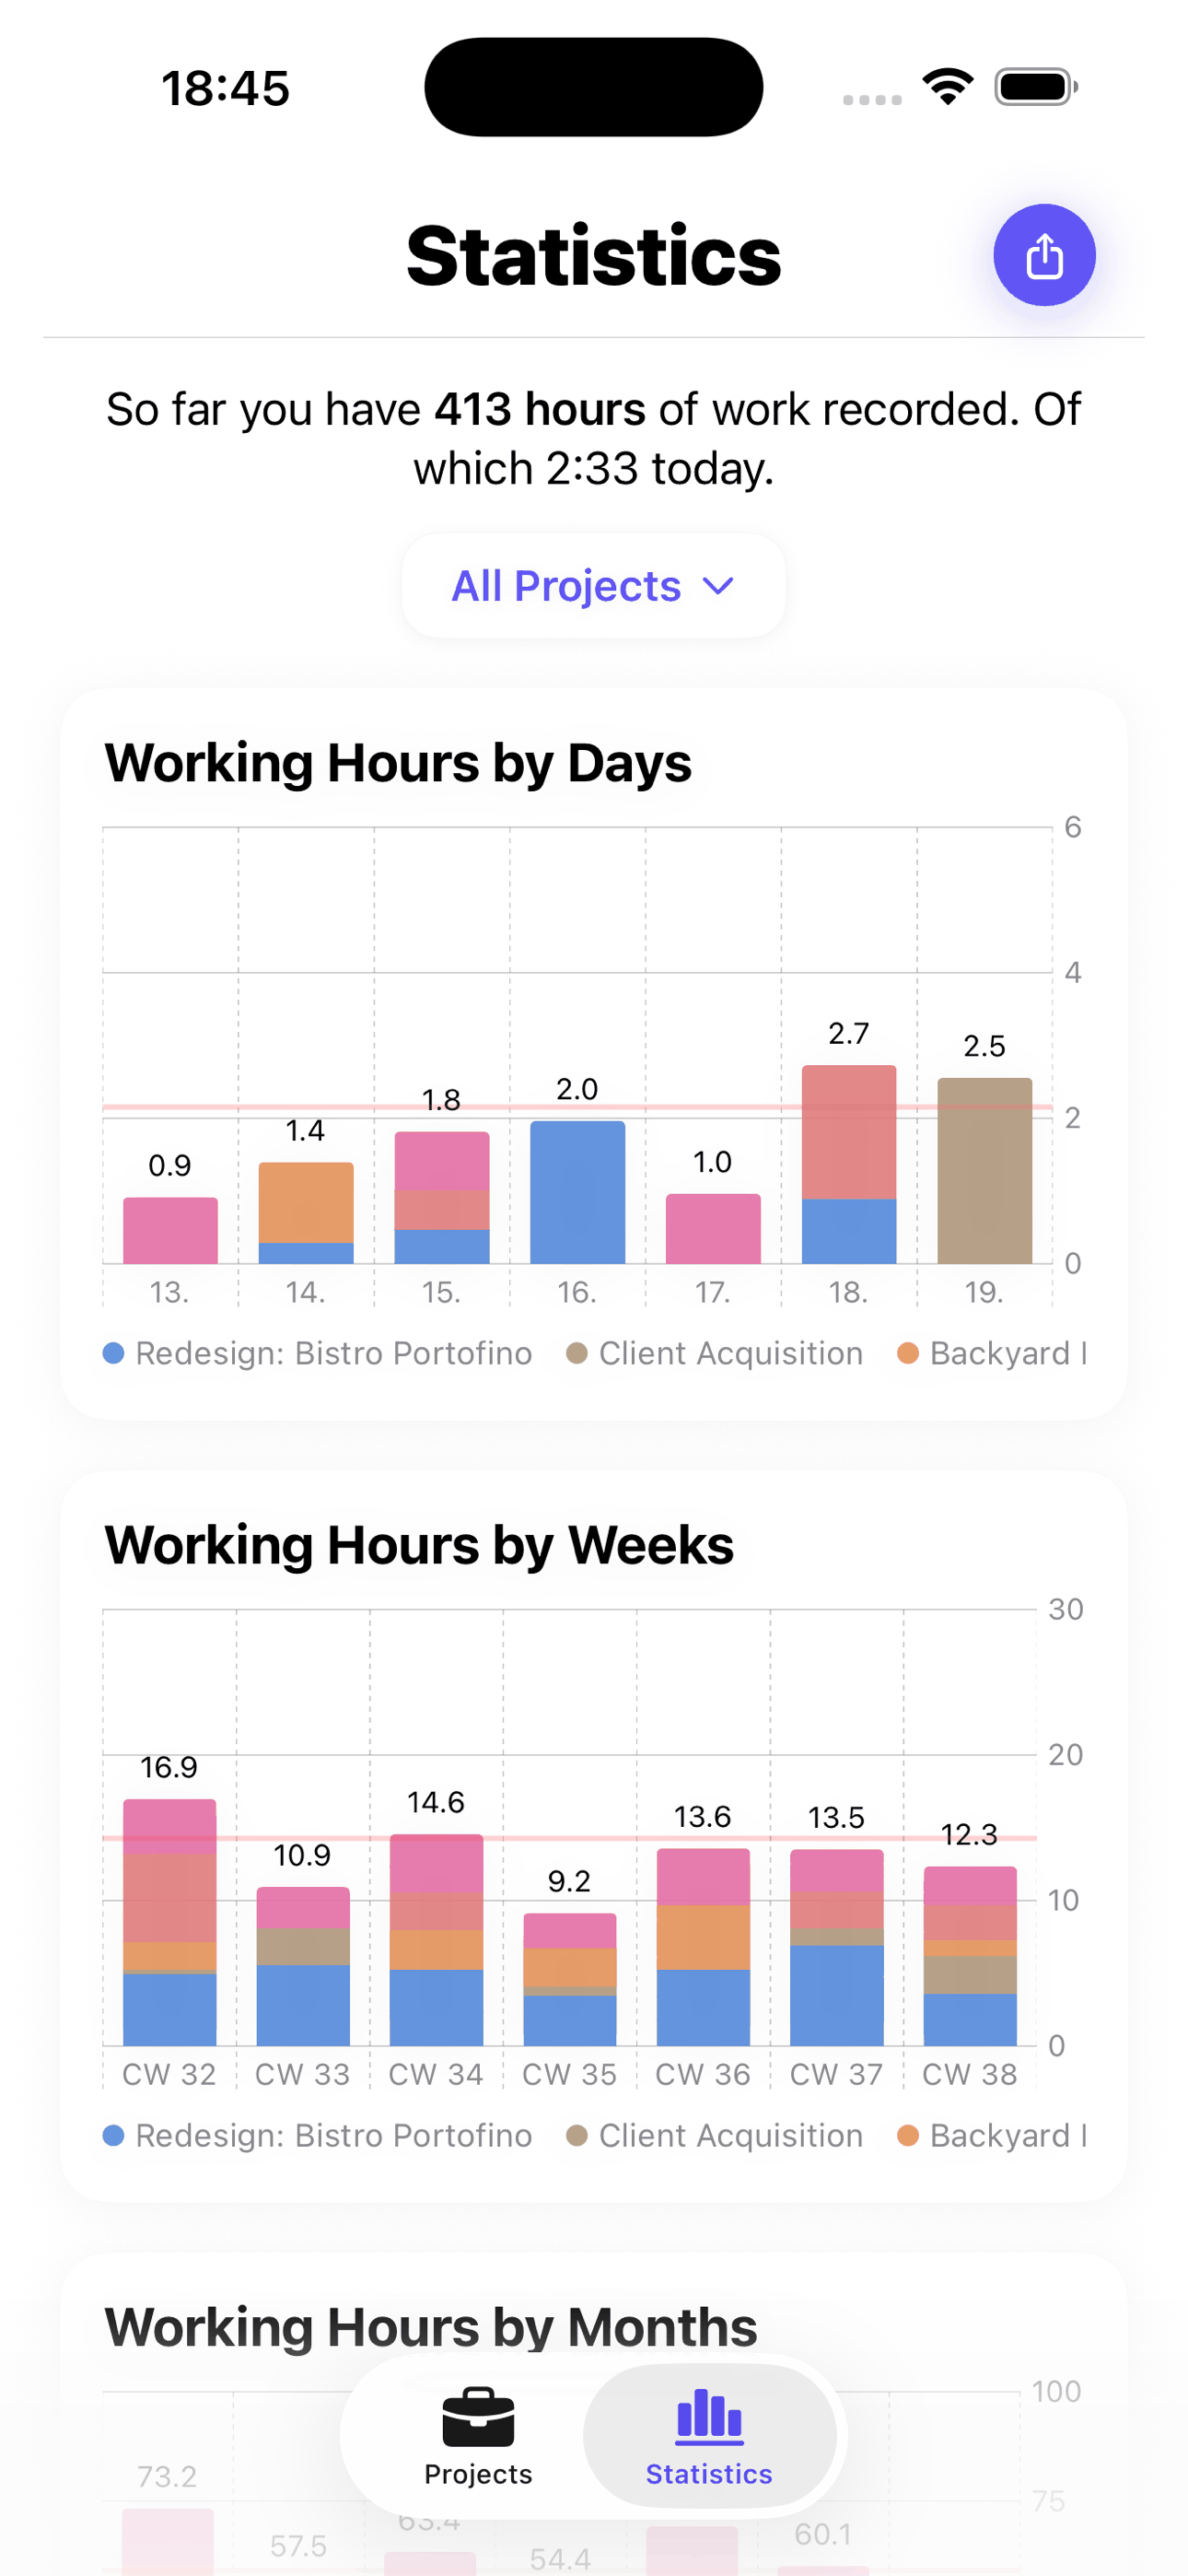
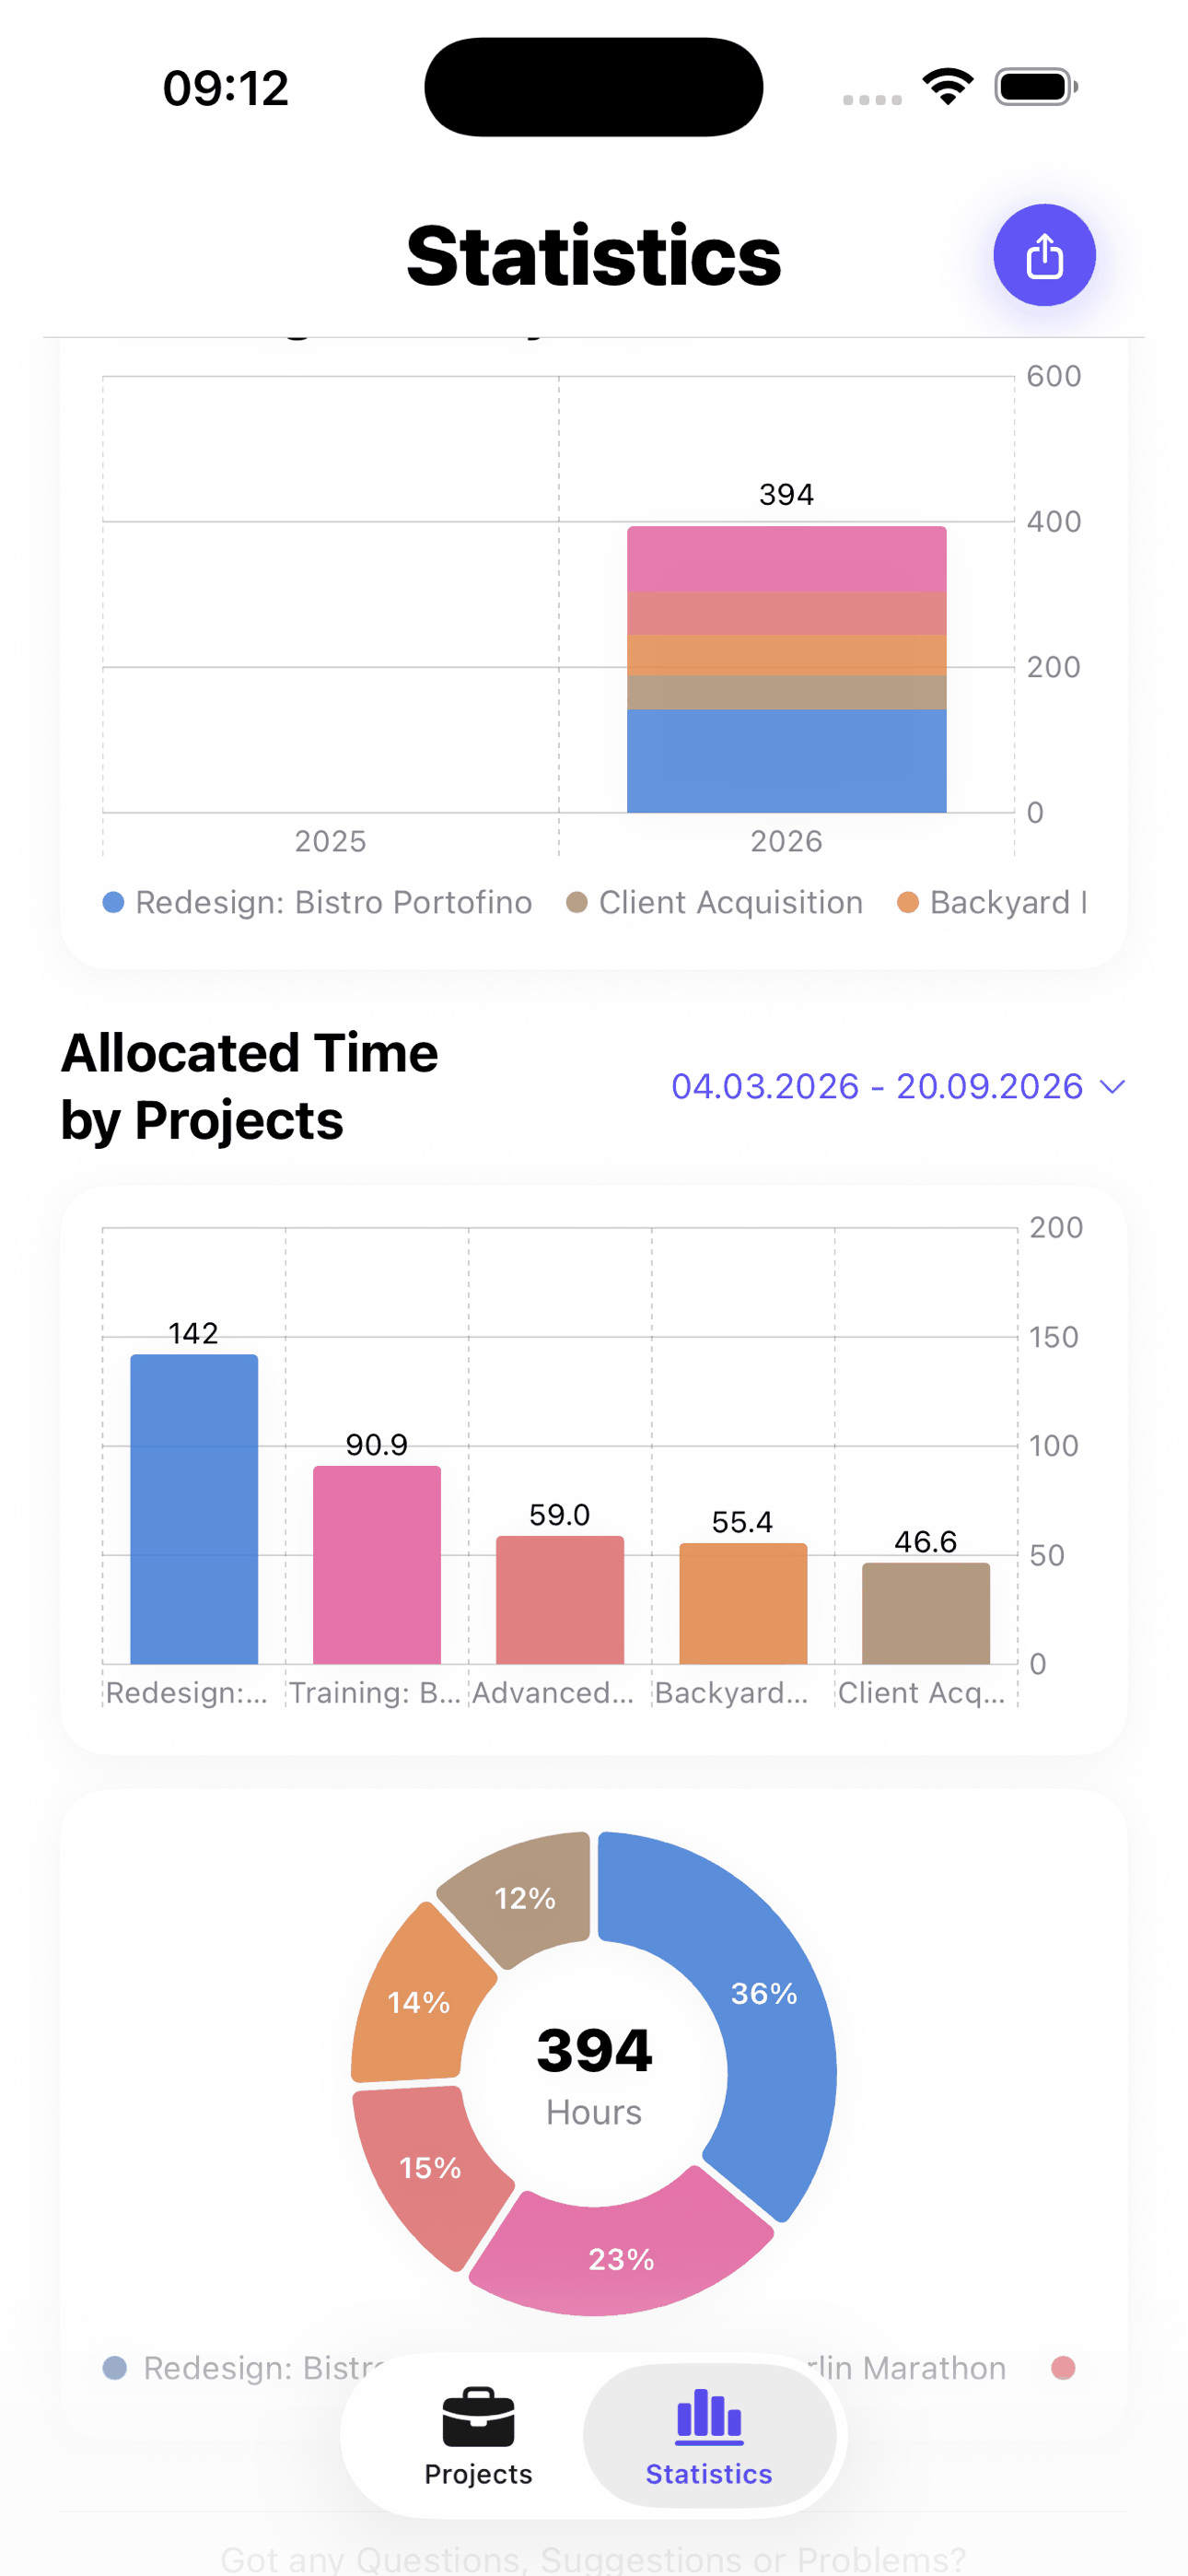
Tap the Statistics tab in the bottom menu to see your hours by day, week, month and year. The colours in the charts represent your projects and tags, so you can tell at a glance which client is actually consuming your week. Swipe right in any chart to go back through earlier periods. Further down, an allocation view breaks your total hours out per project over a date range you choose — this is where you find out whether a fixed-price job is still worth what you quoted.
5. Export Your Hours
This is the step that turns tracked time into money. Export your hours as the basis for an invoice, as proof of work for a client who queries a total, or for your own records at tax time. Tap the export button on the Statistics tab and pick one of five formats:
- Excel (.xlsx) – a real Excel workbook with dates and numbers and a summary on its own sheet. It also opens in Numbers, Google Sheets and LibreOffice.
- PDF – a printable timesheet with a per-project summary, ready to attach to an invoice.
- Calendar (.ics) – one calendar event per entry, importable into Apple, Google and Outlook Calendar.
- CSV – raw data with a summary, for spreadsheets and further processing.
- Backup (JSON) – a complete copy of all projects, tags and entries as a safety copy.
Before exporting you choose the date range and the projects to include, and whether tags and notes should be part of the file. The file then goes out through the normal share sheet – via AirDrop, email or to the cloud. Data export is part of Premium.
More Than a Stopwatch
Beyond plain time tracking, the app has a few features that make everyday use easier.
Live Activity on the Lock Screen
While the timer runs you see it right on your lock screen and in the Dynamic Island: project name, elapsed time and status – so you never have to open the app just to check whether the timer is still going. Tapping it takes you straight to the running project, where you can pause or resume.
Time Guard – Your Daily Limit
Set yourself a daily time limit – either for the current project or across all projects. A progress ring next to the timer shows the current status and turns red once you reach it. The app then notifies you with a reminder to let work rest for the day.
This is deliberately built as protection against overwork, not as a push for more hours. Most time tracking tools optimise for as many billable hours as possible – Time Guard does the opposite. When nobody sends you home at five, a limit you set in advance is the only one there is.
Reorder Your Projects
You can change the order of your projects by tapping and holding one and dragging it up or down the list – the ones you use most go on top. This also changes the order of the projects on the statistics page.
On iPad
On iPad you get a real split-view layout: the project list on the left, the detail view on the right – not a stretched iPhone app. With a hardware keyboard, the things you do most have their own shortcuts:
- ⌘N – new project
- ⇧⌘N – new time entry
- ⌘Space – start and stop the timer
- ⌘E – export your data
One purchase covers both iPhone and iPad.
Download now on the App Store